
Professional Builder Gel Overlay Techniques
Professional builder gel application is a technique used to strengthen the natural nail by applying a high-viscosity gel to create a structural apex. This method reinforces the nail plate, prevents snapping at the stress points, and provides a smooth, durable foundation for gel polish finishes in a professional salon environment.
Essential Tools for Structural Integrity
To achieve a flawless overlay, nail technicians must select the correct viscosity for the client’s nail type. Hard gels or soak-off builder gels are standard choices depending on the required level of support.
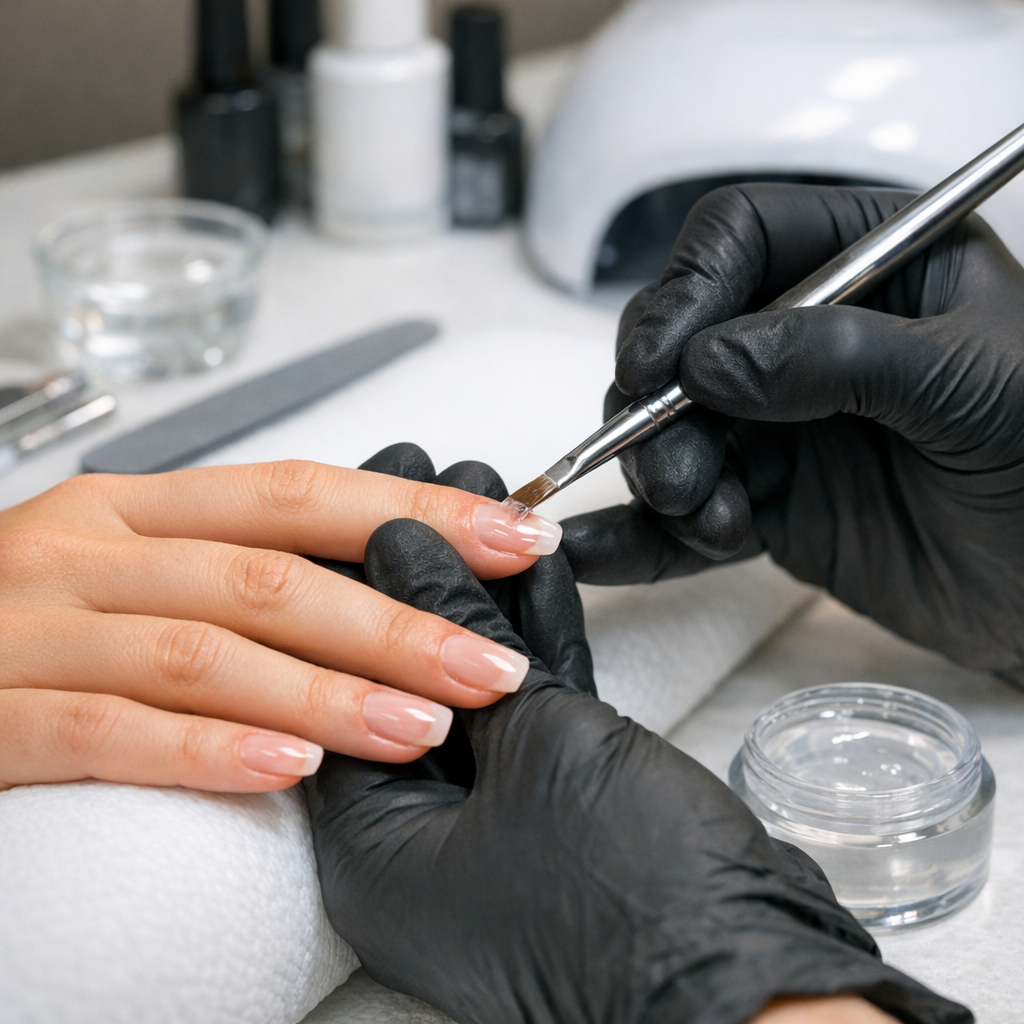
An oval gel brush or a specialized liner brush is necessary for precise product placement near the eponychium. High-quality LED lamps with a low-heat mode are essential for curing thick layers without causing thermal shock.
Nail technicians in California salons often prefer self-leveling formulas to increase efficiency during busy shifts. Having a variety of clear and cover nude shades allows for versatile service options.
The Foundation: Preparation and Slip Layer
Success begins with thorough mechanical and chemical preparation to prevent lifting. Use a 180-grit file to remove the shine and a high-quality dehydrator followed by a protein bonder.
The slip layer is a thin, uncured coating of builder gel applied across the entire nail plate. This layer acts as a track, guiding the larger bead of gel and ensuring it flows smoothly to the edges.
Technicians in New York nail studios emphasize the importance of keeping the slip layer away from the lateral folds. This precision ensures the structure remains centered on the nail plate.
Strategic Apex Placement for Durability
The apex is the thickest part of the gel overlay, strategically positioned over the stress area of the nail. Proper placement absorbs impact and prevents the enhancement from cracking or lifting prematurely.
Pick up a medium-sized bead of gel and place it in the upper third of the nail. Use the brush to gently “tease” the product toward the free edge and sidewalls without touching the skin.
For long-wear results, ensure the product tapers toward the cuticle and free edge. This creates a natural-looking profile that remains structurally sound as the natural nail grows out.
Refinement and Finishing Steps
Once the gel is fully cured, remove the inhibition layer with high-percentage isopropyl alcohol. Refinement filing is the final step to perfect the shape and remove any minor surface irregularities.
Use a 150 or 180-grit hand file to crisp up the side lines and the free edge. For a professional finish, use a buffer to smooth the surface before applying the final top coat.
In humid climates like Florida, ensuring the gel is fully cured is vital to maintain the structural bond. Always check the integrity of the sidewalls before the client leaves the station.
Maintaining Efficiency in the Salon
Mastering the “no-file” technique saves significant time and reduces product waste. By controlling the gel flow during the application, you minimize the need for extensive refinement filing later.
Consistency in bead size and movement speed allows for a predictable workflow. This level of skill execution is what differentiates a master nail technician from a beginner in the industry.