
Mastering the Rubber Base Gel Technique
The rubber base gel technique is a professional nail service that uses a high-viscosity, flexible soak-off gel to strengthen natural nails and correct structural imperfections. This method improves adhesion on thin or flexible plates, providing a durable foundation that resists chipping and lifting for long-lasting salon-quality manicures.
Understanding Rubber Base Viscosity and Chemistry
Rubber base gels differ from standard base coats due to their high plasticizer content and increased viscosity.
This chemical composition allows the product to move with the natural nail, preventing fractures in the coating.
Nail technicians in New York often use this technique for clients with brittle nails that struggle with standard gel polish.
The thick consistency enables the technician to build a structural apex, providing strength at the stress points.
This flexibility is essential for maintaining the integrity of the natural nail plate over several weeks of wear.
Professional-grade rubber bases ensure a strong covalent bond between the keratin and the gel layers.
Step-by-Step Rubber Base Application Technique
Begin with a meticulous dry manicure to clear the eponychium and remove all non-living tissue from the nail plate.
Dehydrate the surface thoroughly using a professional-grade pH balancer to ensure the highest level of adhesion.
For clients in humid climates like Florida, a secondary primer may be necessary to prevent premature lifting.
Applying the Slip Layer
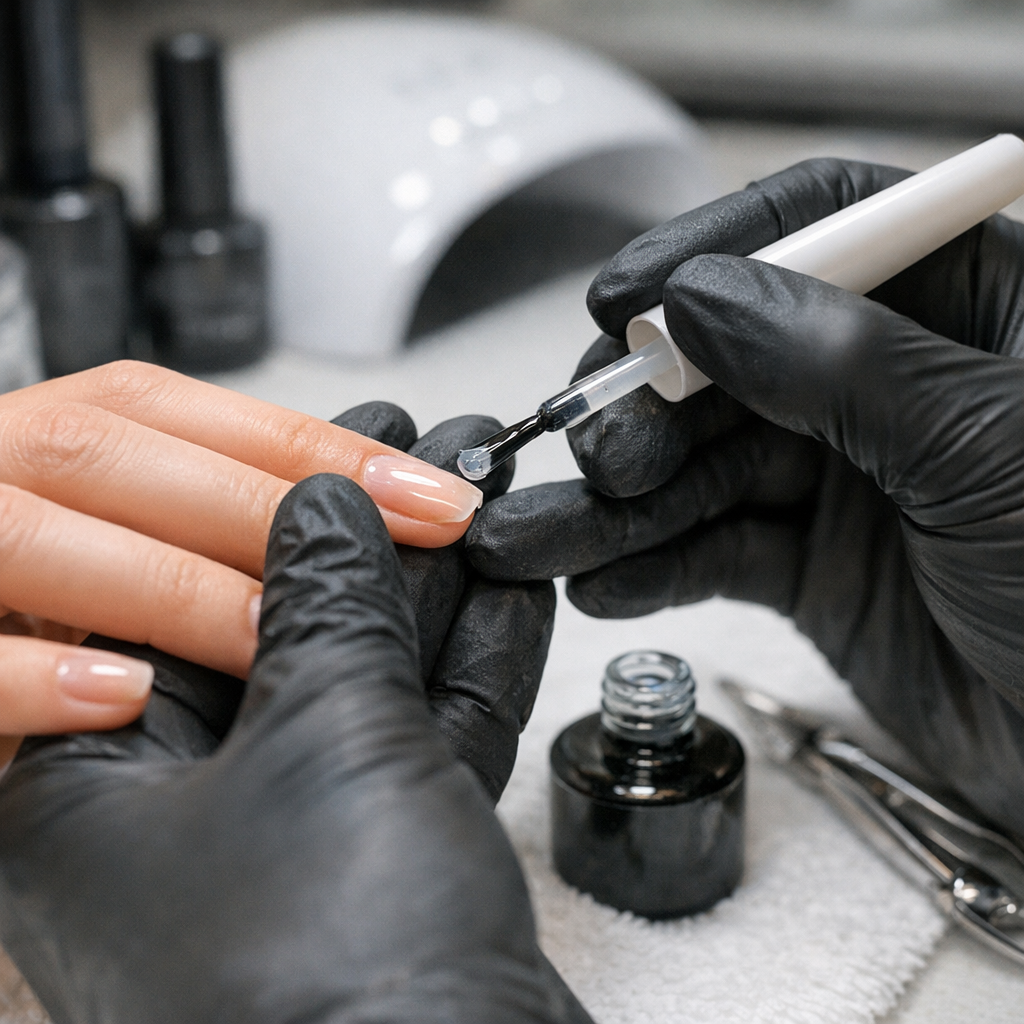
Apply a very thin “slip layer” of rubber base over the entire nail without curing it first.
This uncured layer acts as a track, guiding the larger bead of gel to flow smoothly across the surface.
Ensure the product stays away from the lateral folds and the cuticle area to prevent service failure.
Building the Apex and Structure
Place a medium-sized bead of rubber base near the cuticle and use a liner brush to pull it toward the free edge.
Invert the client’s hand for several seconds to allow gravity to center the product and create a perfect apex.
Check the light reflection on the surface to ensure a smooth, architectural curve before curing in an LED lamp.
Curing Protocols and Thermal Management
Rubber base gels are prone to exothermic reactions, which can cause discomfort or “heat spikes” for the client.
Use a low-heat mode on your professional lamp to slow the polymerization process and reduce heat generation.
Proper curing ensures the gel reaches its full structural potential and prevents under-cured product issues.
Ensure the thumb is cured separately to maintain an even distribution of the gel across the entire nail surface.
Technicians must monitor the curing time strictly according to the manufacturer’s specifications for their specific gel brand.
Consistent curing practices are the hallmark of high-end salon services in professional United States studios.
Refining the Finished Shape
Once cured, the rubber base can be wiped with isopropyl alcohol to remove the inhibition layer for filing.
Use a 180-grit file to refine the free edge and sidewalls if any minor self-leveling issues occurred during application.
This technique results in a reinforced natural nail that is ready for color application or a simple top coat.
The rubber base gel technique provides a significant upgrade to standard gel manicures by adding structural reinforcement.
By mastering the balance between product volume and placement, technicians can offer services that last four weeks or more.
Focusing on precision during the application phase reduces the need for extensive filing and increases chair-time efficiency.