
Mastering Professional Acrylic Nail Application Techniques
Acrylic nail application techniques are professional methods used to combine liquid monomer and polymer powder into a malleable bead for sculpting durable nail enhancements. Mastering these techniques requires precise control over the liquid-to-powder ratio, strategic bead placement, and meticulous cuticle area sealing to ensure maximum adhesion and structural integrity.
The Importance of the Liquid-to-Powder Ratio
Achieving a perfect consistency is the foundation of professional acrylic work. A bead that is too wet will flood the sidewalls and cause lifting, while a dry bead will be brittle and lack the necessary strength for daily wear.
Nail technicians in high-volume environments, such as those in New York, must maintain consistency to ensure service speed and product durability. Proper saturation of the brush before dipping into the polymer powder determines the bead’s performance during the sculpting phase.
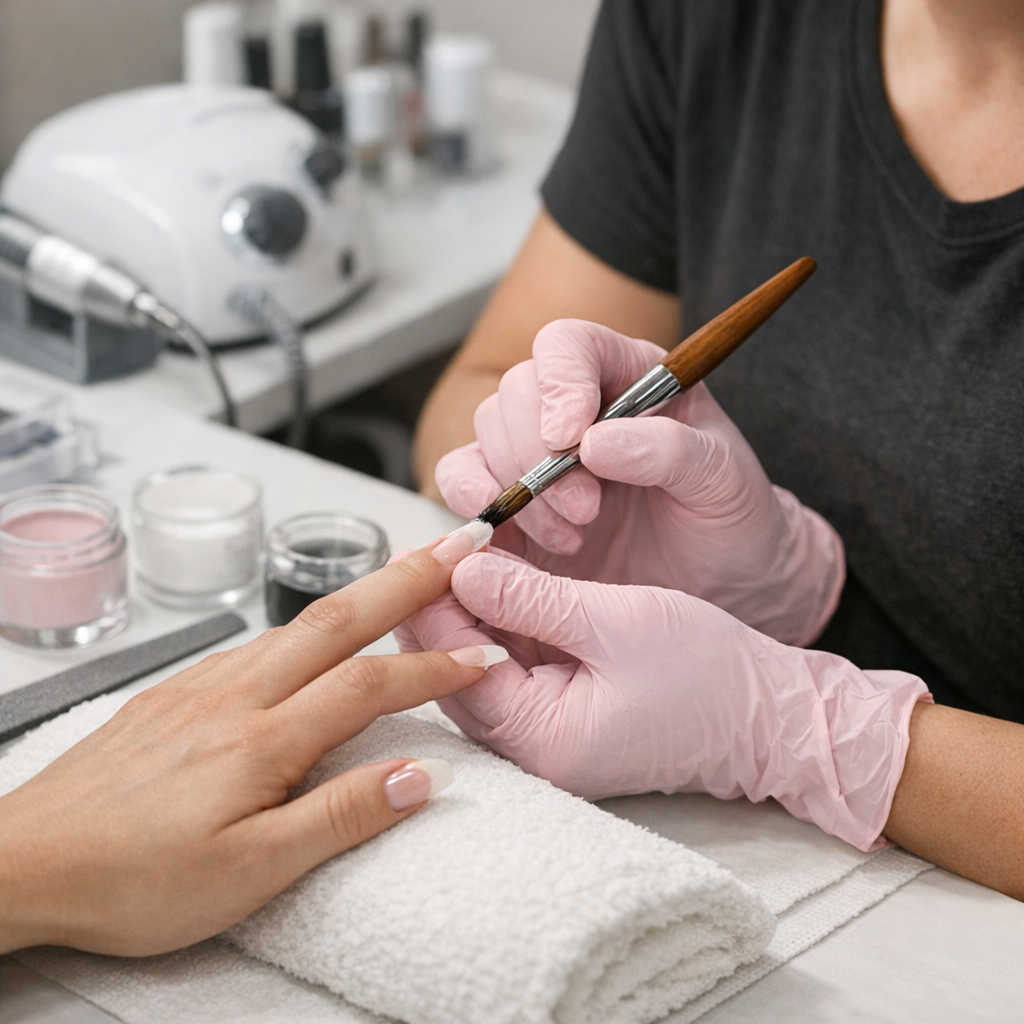
Using a high-quality Kolinsky sable brush allows for better control over the monomer release. This precision helps technicians create a smooth surface that requires minimal filing, significantly improving service efficiency and client satisfaction.
Strategic Bead Placement for Structural Strength
The three-bead method remains the industry standard for creating balanced enhancements. This technique involves placing the first bead at the free edge, the second at the apex, and the third near the cuticle area to create a seamless transition.
The apex is the highest point of the nail and provides the necessary reinforcement against breakage. Professional standards in Dallas salons emphasize building a proper apex to support the length of the enhancement, especially for coffin or stiletto shapes.
When applying the second bead, technicians must blend it downward toward the free edge and upward toward the cuticle. This creates a structural “backbone” that prevents the enhancement from snapping at the stress point under pressure.
Refining the Cuticle Area and Sidewalls
Precision at the cuticle area is what separates amateur work from professional execution. The acrylic must be thinned out as it approaches the proximal nail fold to ensure a flush finish that grows out without catching on hair or clothing.
Technicians should leave a tiny margin between the product and the skin. Flooding the cuticle with monomer or polymer leads to service failure and potential skin irritation, which compromises the professional standards expected in the United States nail industry.
Using the belly of the brush to press and tap the product ensures it adheres firmly to the natural nail plate. This manual compression removes air bubbles and creates a denser, more impact-resistant enhancement.
E-File Refinement and Final Shaping
Once the acrylic has polymerized, the refinement process begins with a professional e-file. Technicians in Los Angeles often utilize specific carbide or ceramic bits to thin the side margins and smooth the surface of the enhancement.
Proper filing technique involves keeping the bit parallel to the nail surface to avoid creating “rings of fire” or thinning the natural nail. The goal is to achieve a symmetrical C-curve and a crisp shape that follows the client’s finger anatomy.
Consistency in shaping requires checking the nail from multiple angles, including the side profile and the “look down” view. This ensures the thickness is uniform across all ten fingers, providing a professional look that meets industry durability standards.