
Professional Hard Gel Application
Professional hard gel application is a nail enhancement technique where a high-viscosity, non-porous UV or LED-curable gel is applied to the natural nail or extensions to provide strength and structure. The process requires thorough nail plate preparation, precise bead placement to create an apex, and proper curing to ensure a long-lasting, durable finish.
Essential Tools and Chemical Selection
Success in hard gel services depends on using professional-grade tools. You need a high-quality UV/LED lamp with a specific wavelength to ensure full polymerization of the gel layers.
Select a variety of synthetic brushes, specifically flat and oval shapes, to manipulate different gel viscosities. Maintain a stock of 180-grit files and 150-grit buffers to refine the enhancement surface effectively.
Professional technicians in New York City salons emphasize the use of high-quality dehydrators and acid-free primers. these chemicals ensure the hard gel adheres perfectly to the keratin of the natural nail plate.
Nail Plate Preparation and Dehydration
Begin by sanitizing the hands and performing detailed cuticle work. Use a professional e-file with a fine diamond bit to remove non-living tissue from the nail plate without causing damage.
Thoroughly buff the shine from the natural nail using a 180-grit file. This creates the necessary surface area for the hard gel to mechanical bond with the natural nail structure.
Apply a professional-strength pH balancer and a primer. Technicians in California must follow strict state board protocols regarding sanitation and chemical application to prevent lifting and ensure client safety.
Establishing the Slip Layer and Apex
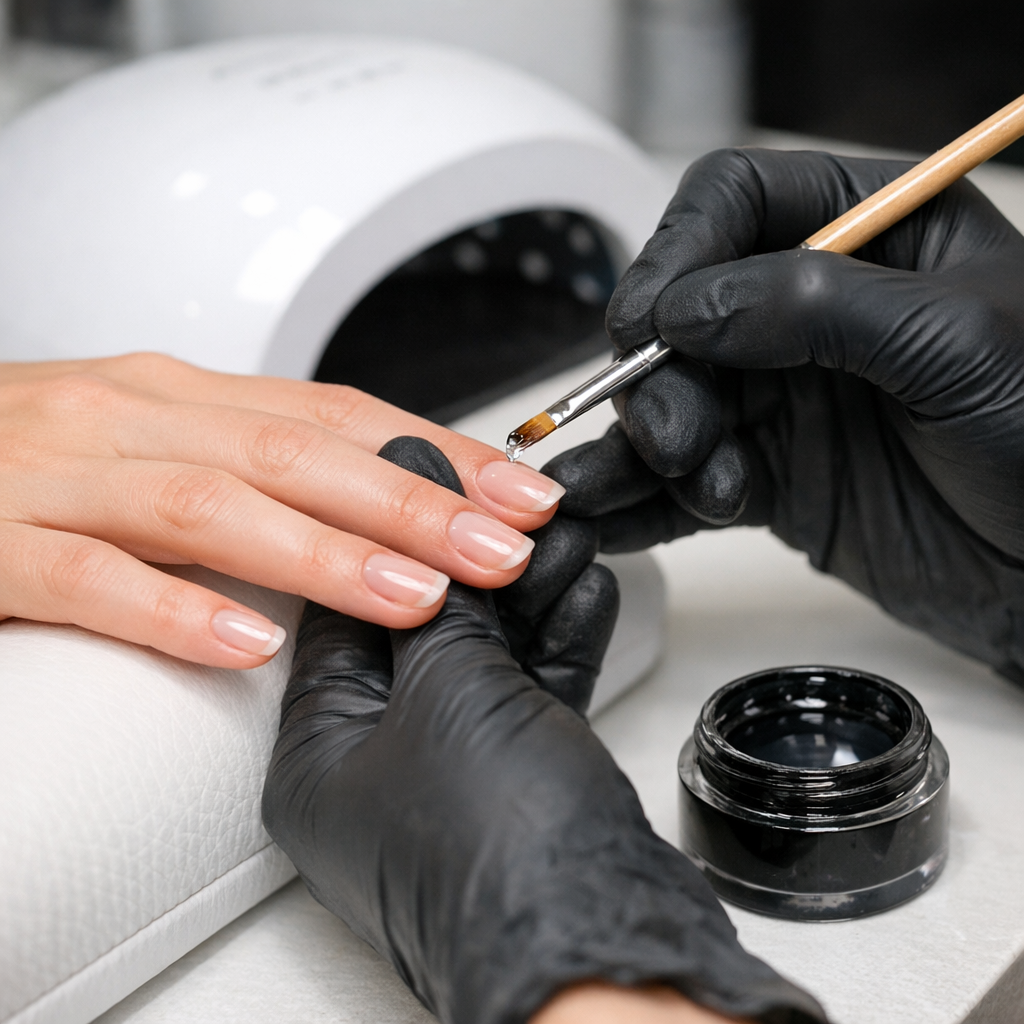
Apply a thin “slip layer” of hard gel across the entire nail surface without curing. This wet layer acts as a guide for the larger bead of gel to flow into place.
Pick up a larger bead of gel and place it near the cuticle area, gently guiding it toward the free edge. Focus on building a structural apex at the stress point of the nail.
In high-volume salons in Florida, efficiency is key. Use the “gravity method” by flipping the client’s hand over for a few seconds to let the gel self-level before curing in the lamp.
Refining the Structure and Finishing
Once cured, remove the inhibition layer using a lint-free wipe and 99% isopropyl alcohol. This allows you to file the surface without clogging your abrasive tools.
Use an e-file or hand file to refine the sidewalls, free edge, and cuticle area. Ensure the transition between the hard gel and the natural nail is seamless and smooth.
Apply a high-shine top coat to seal the enhancement. This final layer protects the hard gel from staining and maintains the structural integrity required for a three-to-four-week wear cycle.